
When it comes to shop fit-out plastering, there are a few things you need to keep in mind to ensure a smooth and professional finish. Click here to know more.
Here are some tips to help you get the best results:
What
1. Make Sure The Surface Is Clean And Free Of Any Debris Before Starting.
First and foremost, you need to make sure that the surface is absolutely clean before you start. This will help the plaster adhere better and create a smoother finish. Any dirt or dust will be visible once the plaster is applied, so it’s important to take the time to prep the surface properly. Otherwise, the plaster will not adhere properly and could cause problems later on.
2. Use Tape.
Use tape to create clean lines and edges. This will give your shop fit out a professional look.
3. Follow The Instructions Carefully.
When mixing the plaster, follow the instructions carefully to ensure that it is the correct consistency. If it is too thick, it will be difficult to work with and may not adhere properly to the surface.
4. Use A Primer.
Use a primer before applying the plaster. This will help the plaster adhere better and create a more even finish.
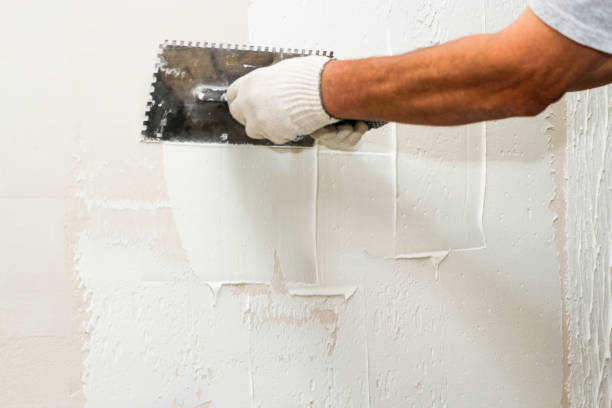
5. Start Applying The Plaster.
Once the surface is clean, you can start applying the plaster. There are a few different ways to do this, but one of the most popular methods is to use a trowel. If you’re not familiar with using a trowel, don’t worry – it’s very easy. Just make sure that you’re using smooth, even strokes and that you’re not putting too much pressure on the surface. When applying the plaster, use long, even strokes to avoid creating bumps or unevenness.
6. Apply The Plaster In Thin Layers.
It’s important to apply the plaster in thin layers so that it dries evenly. If you apply too much plaster at once, it will take longer to dry and could crack or flake off.
7. Make Sure You Are Using The Right Type Of Plaster.
Another important tip for shop fit-out plastering is to make sure that you’re using the right type of plaster. There are a few different types available, but the most popular is gypsum plaster. This type of plaster is very strong and durable, so it’s perfect for use in high-traffic areas. It’s also relatively easy to work with, which means that you won’t have to spend hours trying to get it to look just right. If you’re not sure which type of plaster to use, ask a professional for advice.
8. Use A Wet Sponge.
Use a wet sponge to smooth out the surface after you’ve applied the plaster. Once the plaster is dry, use a wet sponge to smooth out any bumps or imperfections.
9. Let It Dry.
Once you’ve applied the plaster, you’ll need to let it dry. This can take anywhere from a few hours to a few days, depending on the thickness of the plaster.
Allow the plaster to dry completely before painting or wallpapering over it. This will help ensure that the finish is smooth and professional. Just make sure that you use a primer first so that the paint or wallpaper will adhere properly.
It is important to remember that you need to take your time and do it right. If you rush through the process, you may end up with an uneven finish.
Following these simple tips, you should be able to get great results from your shop fit-out plastering project. Just remember to take your time, prep the surface properly, and choose the right type of plaster for the job. With a little bit of effort, you’ll be able to create a beautiful, professional-looking space that will last for years to come.